1
2
3
4
5
6

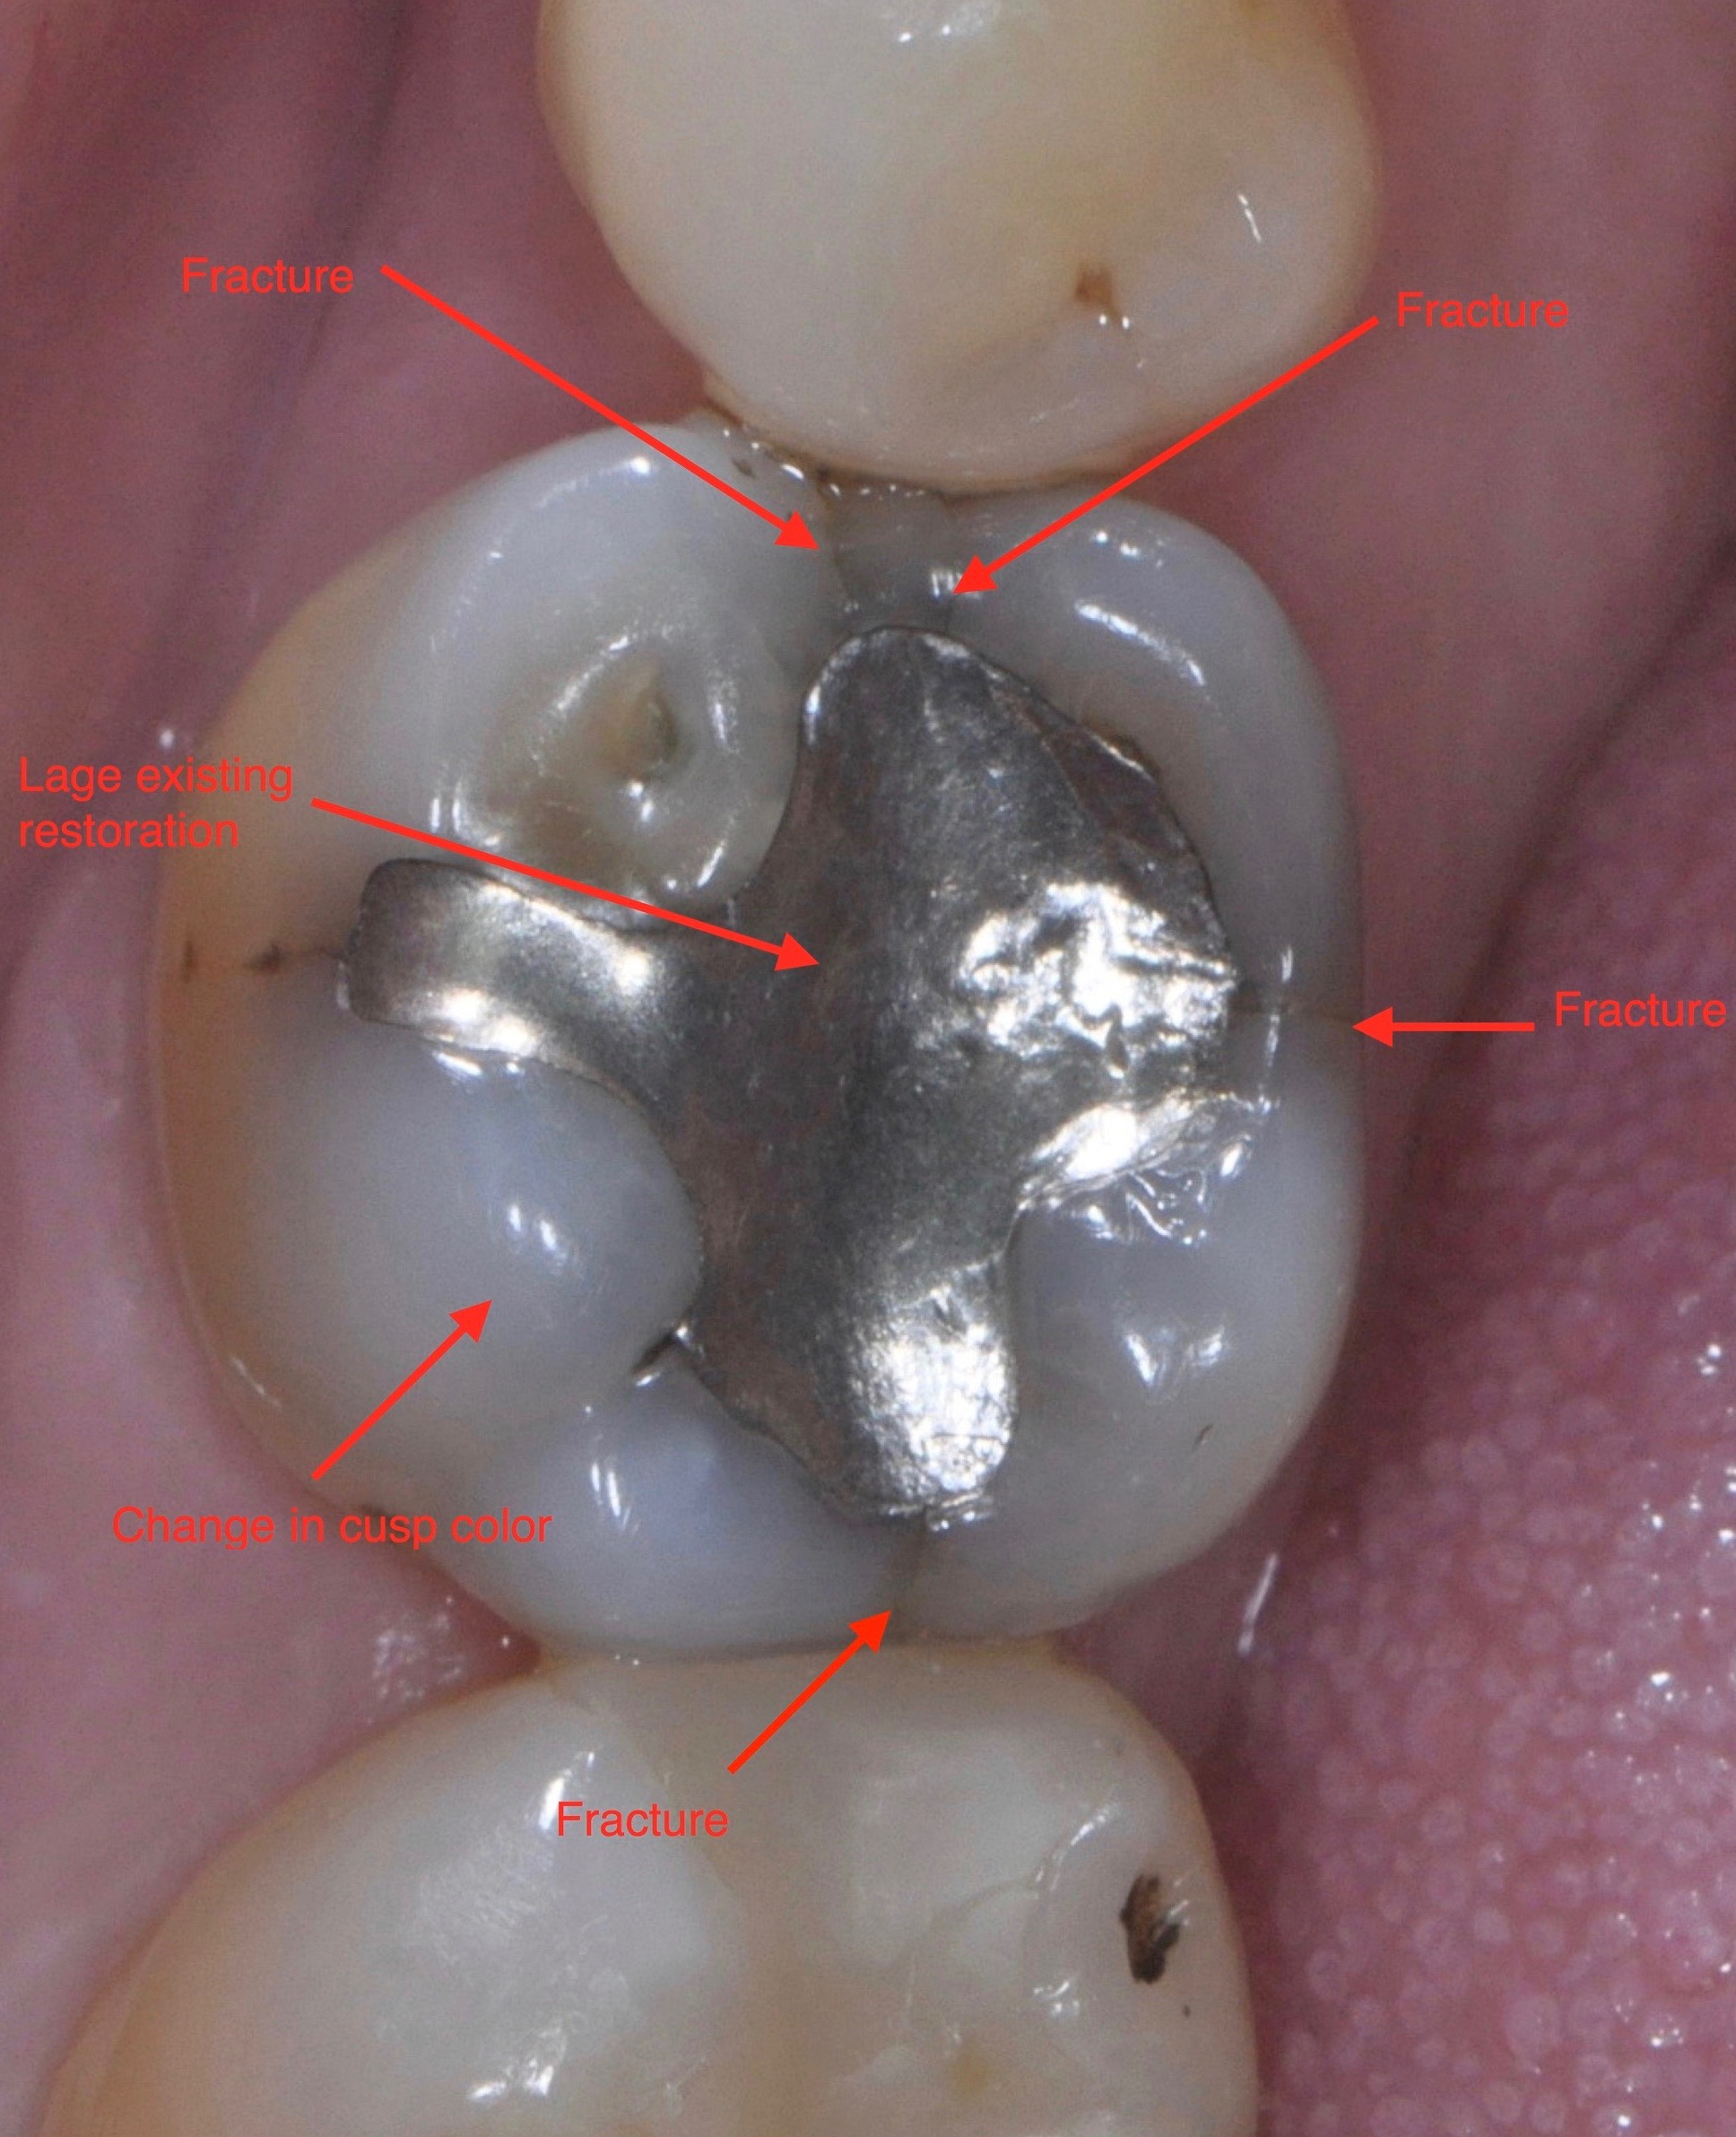
Step One: Diagnosis
A tooth with a large filling, several fractures, and discoloration of the cusps. This tooth requires a crown. Photo: Dr. C.J. Henley
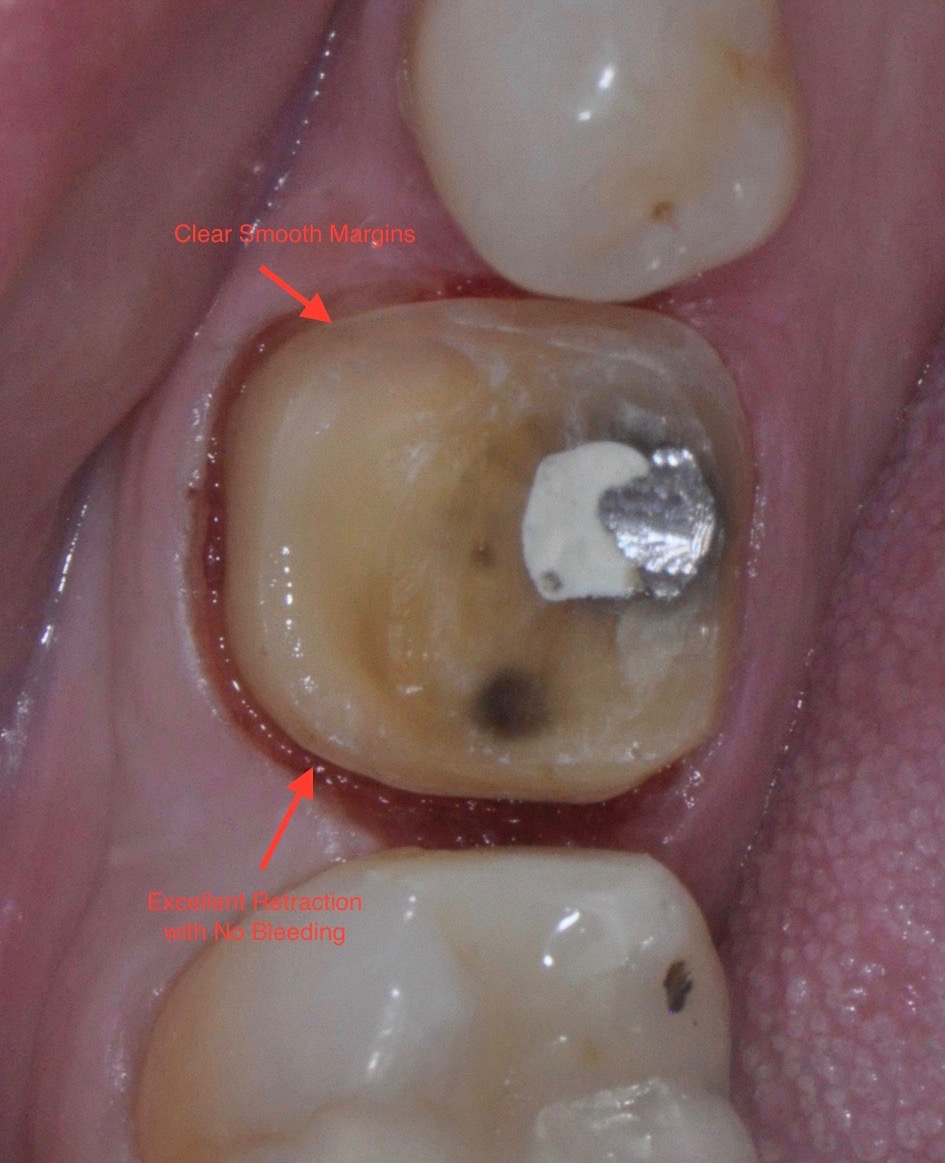
Step Two: Preparation
Completed crown preparation. Note that all margins are smooth and visible. The gums are retracted and there is no bleeding. These are all important factors in producing crowns with excellent fit. Photo: Dr. C.J. Henley
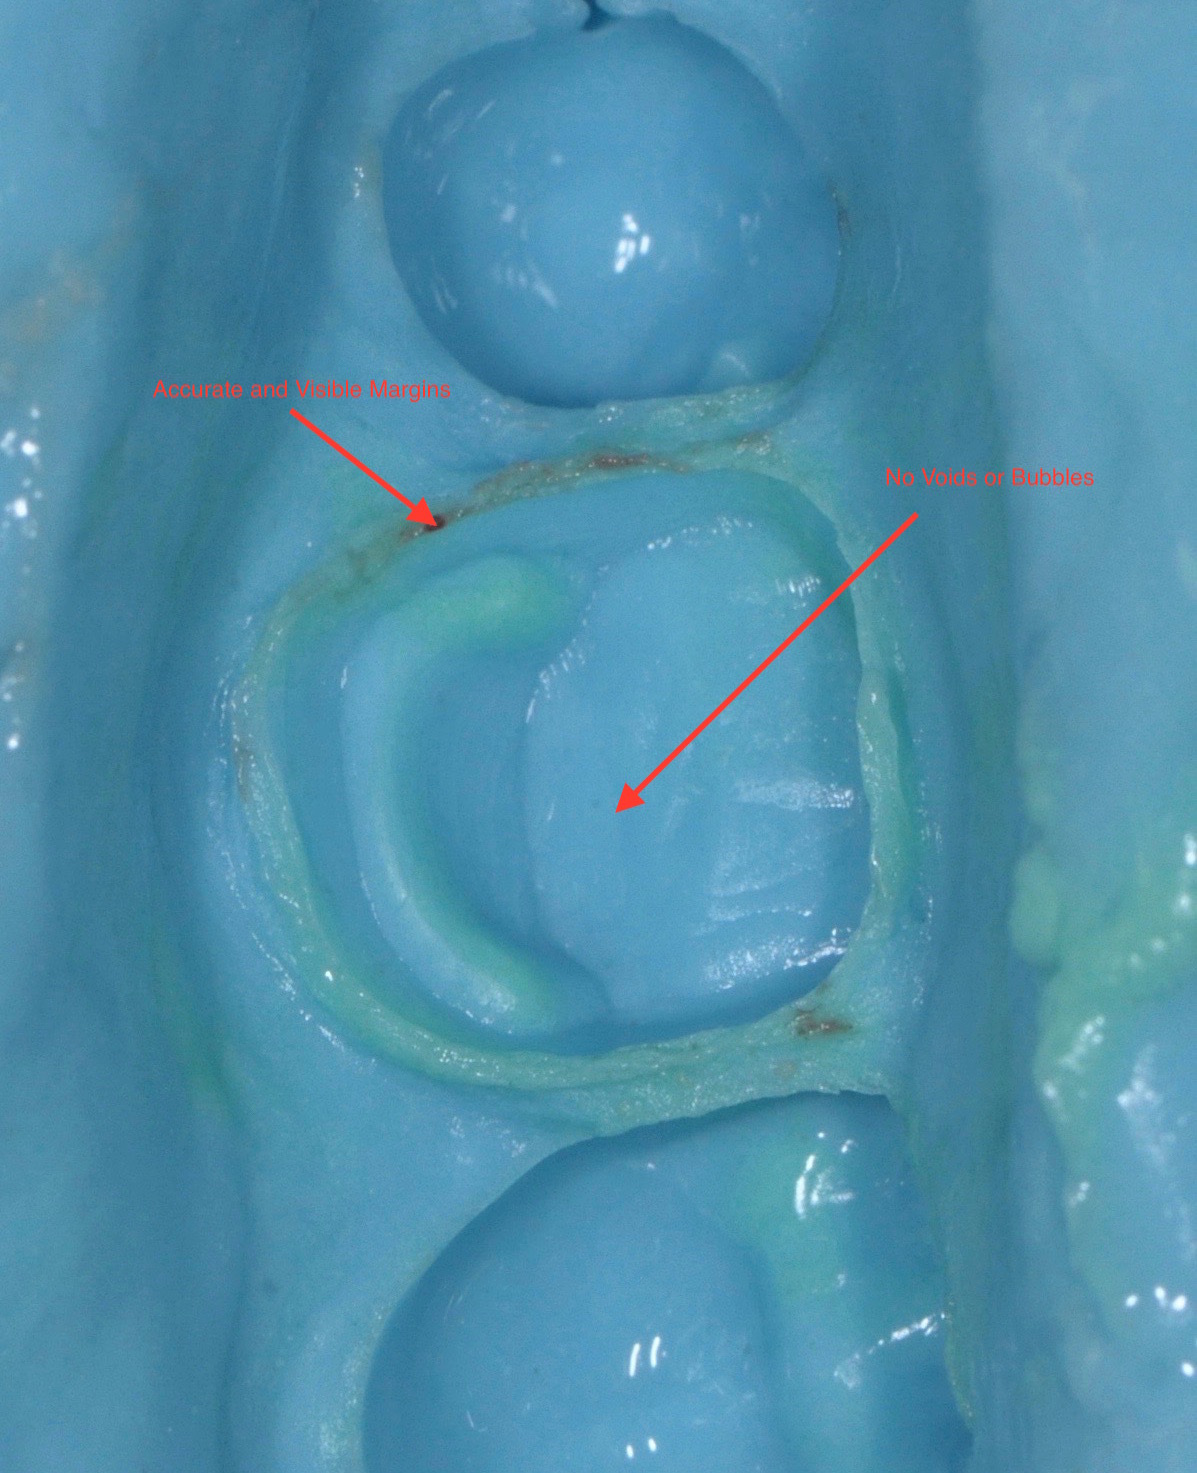
Step Three: Taking an Impression
This is a completed crown impression. it is critical that there are no voids in the impression so the laboratory has the most accurate information possible. Photo: Dr. C.J. Henley
Step Four: Fabrication of a Temporary Crown
A temporary crown made from a special acrylic is make for you by a doctor. It is important that the temporary fits well to make sure that you are comfortable while your permanent crown is made
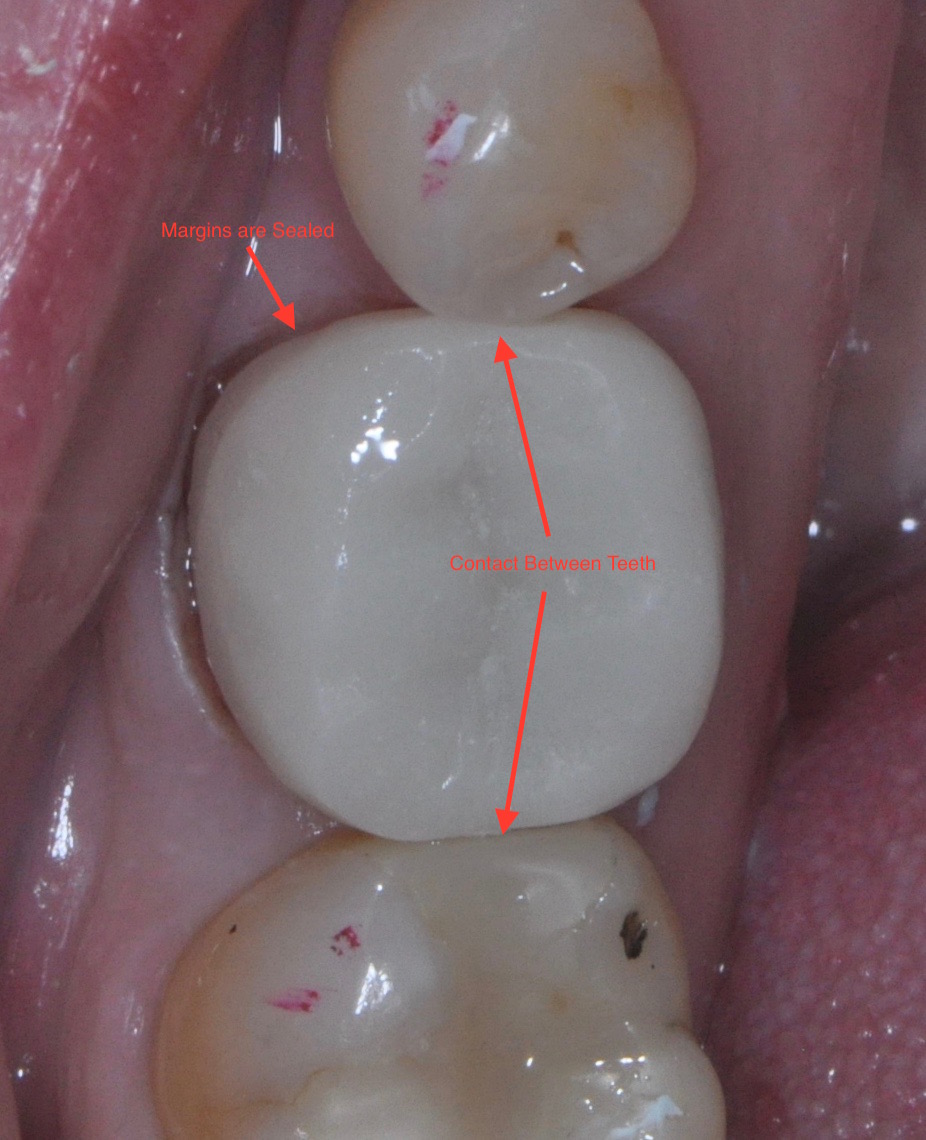
Step Five: Delivery
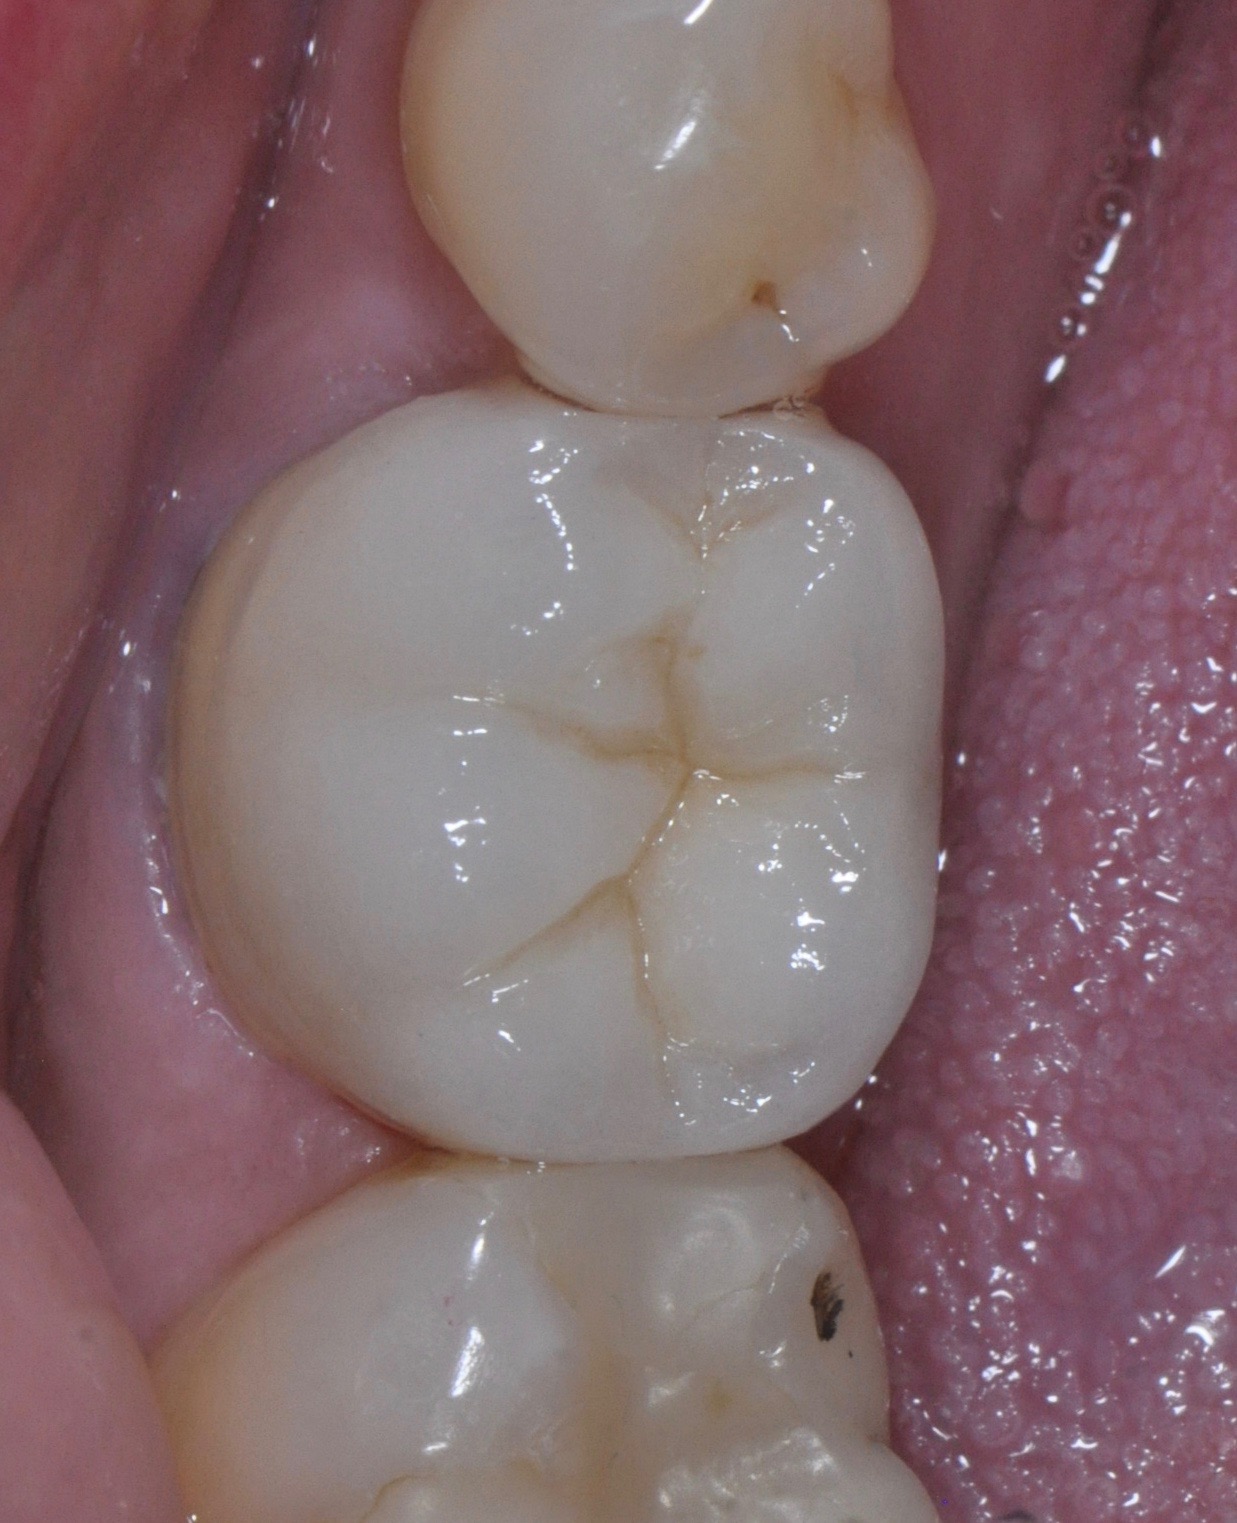
The final crown is delivered using a permanent cement. The crown is matched to the color and shape of your teeth. Photo: Dr. C.J. Henley
Step Six: Verification of Seat with X-Ray
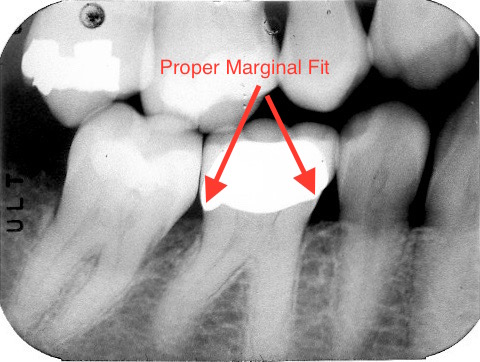
The final step is to take an x-ray of the tooth to verify that the crown is seated properly. Photo: Dr. C.J. Henley